
The Android 8.0 Oreo comes with new features like picture-in-picture and Autofill to help you navigate tasks seamlessly. Plus, it’s got stronger security protections and speed improvements that keep you safe and moving at light speed. Download Android 8.0 Oreo System Images for Nexus and Pixel Devices from the links below.
There are two methods to install or flash Android Oreo on your device. Either install Android Oreo OTA Updates or Download the Factory Images of Android Oreo and flash it manually.
Android 8.0 OTA files for Nexus and Pixel devices is currently not available but we will share it as soon as it available.
Download Android 8.0 Oreo Factory Image for Nexus and Pixel Devices
Download Android 8.0 Oreo Factory Image for Nexus Devices
- Android 8.0 Oreo System Image for Nexus 5X: Download
- Android 8.0 Oreo System Image for Nexus 6P: Download
- Android 8.0 Oreo System Image for Nexus Player: Download
- Android 8.0 Oreo System Image for Nexus 6: Soon
- Android 8.0 Oreo System Image for Nexus 9: Soon
Download Android 8.0 Oreo Factory Image for Pixel Devices
- Android 8.0 Oreo System Image for Pixel C: Download
- Android 8.0 Oreo System Image for Pixel (Telstra, Rogers, TMO, Sprint, USCC, Project Fi): Download
- Android 8.0 Oreo System Image for Pixel (other carriers): Download
- Android 8.0 Oreo System Image for Pixel XL (Telstra, Rogers, TMO, Sprint, USCC, Project Fi): Download
- Android 8.0 Oreo System Image for Pixel XL (Telstra, Rogers, TMO, Sprint, USCC, Project Fi): Download
- Android 8.0 Oreo System Image for Pixel XL (other carriers): Download
Note –
- Download Android 8.0 Oreo for your device from above.
- Make sure ADB and Fastboot driver installed (Check out How to setup ADB and Fastboot on windows)
- Take Complete Backup of your Device with Titanium backup.
How to Install Android Oreo Factory Image on Pixel and Nexus Devices –
Unlock Bootloader to Install Android Oreo
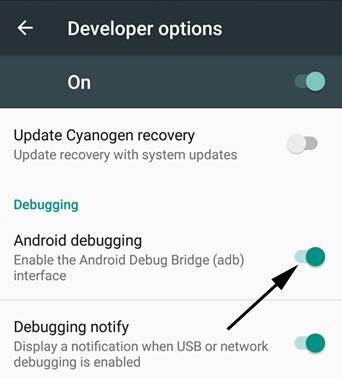
1) First enable ‘USB debugging’ and ‘OEM Unlock’ option from setting>developer option>. To enable Developer Options, go to About phone and tap the Build Number 7 times.
2) Go to ADB installation directory and press and hold ‘shift’ key and right-clicked anywhere in the folder and select ‘Open command window here’.
3) Now connect your device to PC and enter into the fastboot mode.
adb reboot bootloader
4) You are in Fastboot mode now to check your connection by entering below command in command prompt.
fastboot devices
5) To unlock bootloader of Pixel on Android Oreo, go to the command line and type below command. It will only take seconds to complete the process.
fastboot flashing unlock
6) Now your device will reboot into bootloader mode.
Flashing Android Oreo Factory Image on Pixel and Nexus Devices
1) Download the Android Oreo factory image for your device and unzip it.
2) Connect your device to the PC over USB and Enable USB Debugging option from setting>developer option>.
3) Now connect your device to PC and enter into the fastboot mode. To enter in fastboot mode press and hold ‘Volume Up + Volume Down + Power’ button or by typing “adb reboot bootloader”
4) Open the command prompt and navigate to the unzipped system image directory.
5) Now Execute the “flash-all.bat“, it will unzip the image files and install the necessary bootloader, baseband firmware(s), and operating system. The step will install Android Oreo system image on Nexus and Pixel devices.
If flash-all.bat file not work, you can pass all commands manually by –
1) First, flash the bootloader and the radio
fastboot flash bootloader <bootloader file name here>.img
fastboot flash radio <radio file name here>.img
fastboot reboot-bootloader
2) Flash the recovery, boot, and system
fastboot flash recovery recovery.img
fastboot flash boot boot.img
fastboot flash system system.img
3) Now a full wipe, flash cache and userdata
fastboot flash cache cache.img
fastboot flash userdata userdata.img
4) Reboot your device
fastboot reboot
5) That’s all.

official KDZ firmware")