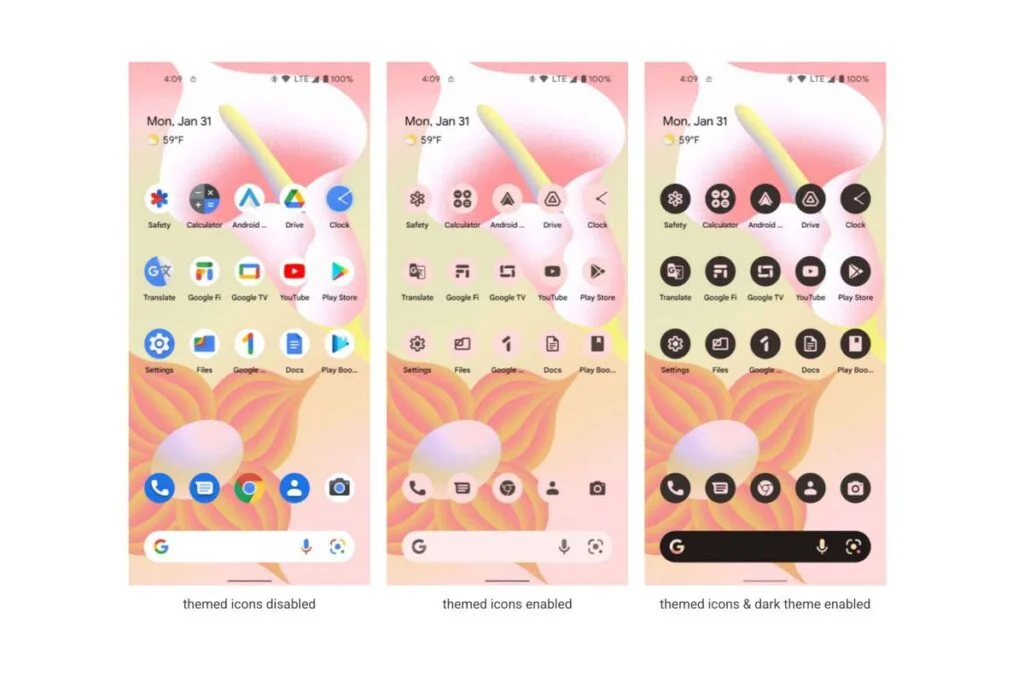
This is the first time Android 13 is seen, and it is definitely great news for people who love to flash newer Android versions to know that Google has made system images available for download. If you have the right hardware, you can give it a try right now. There aren’t as many devices that work this time around. All you can choose from are the Google Pixel 4, Pixel 4 XL, Pixel 4a, Pixel 4a 5G, Pixel 5, Pixel 5a, Pixel 6, and the Pixel 6 Pro, which are all phones from Google.

So, Google doesn’t want to make it too easy for you to install the first developer preview of Android 13. It’s still a work in progress. You’ll need a Pixel smartphone with an unlocked bootloader in order to use your computer to flash the system image. If your Pixel doesn’t have an unlocked bootloader, there are also OTA files that can help you get the Developer Preview on your phone.
It is not just the device-specific firmware that Google has made available. It also has a Generic System Image (GSI) that can be used on a lot more devices. Google tested them on the Pixel phones, but they should work on any Project Treble-compatible device.
How to install Android 13 via Recovery (Stock) using ADB
As part of the process of installing the Developer Preview, you must sideload the correct OTA package for your device from Recovery through ADB in order to do so. This procedure also will works for Pixel phones, regardles if the bootloader is locked or unlocked.
| Device | Download Link |
|---|---|
| Pixel 4 | flame-ota-tpp1.220114.016-a661d210.zip |
| Pixel 4 XL | coral-ota-tpp1.220114.016-e8ab39b8.zip |
| Pixel 4a | sunfish-ota-tpp1.220114.016-cc35dd6d.zip |
| Pixel 4a (5G) | bramble-ota-tpp1.220114.016-ee42063d.zip |
| Pixel 5 | redfin-ota-tpp1.220114.016-279485e6.zip |
| Pixel 5a | barbet-ota-tpp1.220114.016-1187a9eb.zip |
| Pixel 6 | oriole-ota-tpp1.220114.016-9c164373.zip |
| Pixel 6 Pro | raven-ota-tpp1.220114.016-e226a305.zip |
- You can get the update.zip file on your computer from the links in the table above. To make things easier, you could change the name of this download OTA file and put it in the same place on your computer where ADB is.
- Turn on USB Debugging on your phone. Start by looking by going to Settings, then About Phone. Tap Build Number 7 times, and then enter your device pattern, PIN, or password (if requested) to enable Developer Options. Once this is done, go to Settings > Developer Options and search for the option to turn on USB Debugging.
- Now, you need to connect the smartphone to your computer using a USB cable. You can run adb devices command in CMD/Terminal to confirm if you correctly enabled USB Debugging. If your device serial number is returned, you are set.
- While the device is still connected to your computer, type in the command below to reboot device into recovery mode-
adb reboot recovery - On your phone’s screen, you should see “No command.” Once that shows up, press and hold your phone’s Power button. Press the Volume Up button while holding Power, then quickly release both buttons. Android recovery menu should show up at this point.
- From the recovery menu, choose the option Apply Update from ADB.
- Again, run the command below and your device serial number will once again display. This time, with sideload next to the shown serial number.
adb devices - Now that you’re all setup, proceed to installing Android 13 by running the command below:
Replace android-13-file.zip with the correct file name you downloaded.adb sideload android-13-file.zip
How to install Android 13 via Fastboot (Unlocked Bootloader)
If your Google Pixel device’s bootloader is unlocked, you’re better off using Fastboot to flash the Android 13 Developer Preview factory image. This is usually accomplished using a flash-all.sh or flash-all.bat script file included in the downloaded file, although the default configuration wipes the device clean. You can, however, keep your data by removing the “-w” wipe attribute from the script’s command.
Open the flash-all.sh script file in your preferred code/text editor if you’re on macOS/Linux, or the flash-all.bat script file if you’re on Windows. Search for and remove “-w” from the script and save, to prevent erasing your device data. This is not a good idea however, as a complete factory reset is necessary to ensure that the device runs smoothly.
You can download Android 13 factory image ZIP file for your computer below
| Device | Download Link |
|---|---|
| Pixel 4 | flame-tpp1.220114.016-factory-ae1be30d.zip |
| Pixel 4 XL | coral-tpp1.220114.016-factory-96533879.zip |
| Pixel 4a | sunfish-tpp1.220114.016-factory-06a09358.zip |
| Pixel 4a (5G) | bramble-tpp1.220114.016-factory-70c42a34.zip |
| Pixel 5 | redfin-tpp1.220114.016-factory-b02592b5.zip |
| Pixel 5a | barbet-tpp1.220114.016-factory-1b66f4a5.zip |
| Pixel 6 | oriole-tpp1.220114.016-factory-0616975d.zip |
| Pixel 6 Pro | raven-tpp1.220114.016-factory-6ab44e00.zip |
For simplicity, extract the .zip file contents, then copy and paste the resulting files into your ADB/Fastboot folder on your PC.
- Activate USB Debugging on your phone (if you haven’t done this already) by going to Settings > Developer Options, then find/enable USB Debugging. If developer options is not enabled already (usually), navigate to Settings > About Phone and tap Build Number seven (7) times. You might be required to input your pattern, PIN, or password. Now go back and enable USB Debugging.
- Connect your phone to your computer through a USB cable. If this is the first time you’re connecting with this computer’s ADB instance, authorize your computer connection on your phone when the prompt appears.
- Reboot to Fastboot mode by running the command:
adb reboot bootloader - Now run the code below to flash Android 13 (on Linux/Mac)
You can alternatively launch Terminal (Linux), then drag/drop flash-all.sh in Terminal UI and hit Enter on your keyboard to flash.flash-all
Windows users will have to manually run flash-all.bat script to initiate the flashing process.

